Here I will show you how to quickly setup a Redis master-slave topology in k8s using Terraform.
If you just want to quickly get the tf file and folder structure, you can find it here: https://github.com/wifiwolfg/redis-k8s-terraform
Key points to consider
If you want to test this locally, you will need:
- A local working cluster.
- Terraform.
Versions I used for this post:
- Minikube v1.25.2
- Kubernetes v1.23
- Terraform v1.2.2
- TF kubernetes provider v2.11.0
Before you start
The approach I am taking here is with internal TF resource references. This avoids certain human errors like mistyping the namespace, for example. The complete configuration can be inside one terraform file but here I will explain it part by part.
If you want to go directly to the terraform and redis resources, visit the repo here: https://github.com/wifiwolfg/redis-k8s-terraform
Namespace creation
This is very straight forward. The following block creates a namespace called redis.
resource "kubernetes_namespace_v1" "redis" {
  metadata {
    annotations = {
      name = "redis"
    }
    name = "redis"
  }
}
The headless service
Why do we need a headless service?
In simple terms, because it is a requirement when you use StatefulSets. StatefulSets are ideal when you are looking for “quoting the k8s docs”:
- Stable, unique network identifiers.
- Stable, persistent storage.
- Ordered, graceful deployment and scaling.
- Ordered, automated rolling updates.
Deploying the headless service
When setting a cluster_ip = “None”, you are creating a headless service. The namespace makes reference to the previous resource we created. As you see, we don’t need to actually type the namespace name, we just reference the resource name.
resource "kubernetes_service_v1" "redis-service" {
  metadata {
    name      = "redis-service"
    namespace = kubernetes_namespace_v1.redis.metadata.0.name
    labels = {
      app = "redis"
    }
  }

  spec {
    port {
      port = 6379
    }

    selector = {
      app = "redis"
    }
    cluster_ip = "None"
  }
}
The configmap
There is a nice tip on the following block and is, in fact, you can reference a complete configmap from a different file, you don’t need to actually write it all inside the configuration. I put two different examples here, one with a hardcoded configuration “slave.conf”, and one with the reference “master.conf”.
resource "kubernetes_config_map_v1" "redis" {
  metadata {
    name      = "redis-ss-configuration"
    namespace = kubernetes_namespace_v1.redis.metadata.0.name
    labels = {
      app = "redis"
    }
  }

  data = {
    "master.conf" = "${file("${path.module}/configmaps/master.conf")}"
    "slave.conf"  = <<EOF
        slaveof redis-ss-0.redis-service.redis 6379
        maxmemory 400mb
        maxmemory-policy allkeys-lru
        timeout 0
        dir /data
    EOF
  }
}
This will look for a configmap folder in your root directory that should contain the master.conf file. You can also verify it here: https://github.com/wifiwolfg/redis-k8s-terraform
The StatefulSet
There are several things going on here so I will break it down a bit. First, let’s take a look at the whole configuration:
resource "kubernetes_stateful_set_v1" "redis-ss" {
  metadata {
    name      = "redis-ss"
    namespace = kubernetes_namespace_v1.redis.metadata.0.name
    annotations = {
    }
  }

  spec {
    replicas = 1

    selector {
      match_labels = {
        app = "redis"
      }
    }
    service_name = kubernetes_service_v1.redis-service.metadata.0.name

    template {
      metadata {
        labels = {
          app = "redis"
        }

        annotations = {
        }
      }

      spec {
        init_container {
          name              = "init-redis"
          image             = "redis:7.0.0"
          image_pull_policy = "IfNotPresent"
          command           = ["/bin/bash", "-c", ]
          args = [<<-EOF
            set -ex
            # Generate redis server-id from pod ordinal index.
            [[ `hostname` =~ -([0-9]+)$ ]] || exit 1
            ordinal=$${BASH_REMATCH[1]}
            # Copy appropriate redis config files from config-map to respective directories.
            if [[ $ordinal -eq 0 ]]; then
                cp /mnt/master.conf /etc/redis-config.conf
            else
                cp /mnt/slave.conf /etc/redis-config.conf
            fi
            EOF
          ]

          volume_mount {
            name       = "redis-claim"
            mount_path = "/etc"
          }
          volume_mount {
            name       = "config-map"
            mount_path = "/mnt/"
          }
        }

        container {
          name              = "redis"
          image             = "redis:7.0.0"
          image_pull_policy = "IfNotPresent"

          port {
            container_port = 6379
            name           = "redis-ss"
          }
          command = ["redis-server", "/etc/redis-config.conf"]

          volume_mount {
            name       = "redis-data"
            mount_path = "/data"
          }

          volume_mount {
            name       = "redis-claim"
            mount_path = "/etc"
          }
          resources {
            limits = {
              cpu    = "1"
              memory = "1Gi"
            }

            requests = {
              cpu    = "0.5"
              memory = "100Mi"
            }
          }
        }
        volume {
          name = "config-map"
          config_map {
            name = kubernetes_config_map_v1.redis.metadata.0.name
          }
        }
      }
    }
    volume_claim_template {
      metadata {
        name = "redis-data"
      }
      spec {
        access_modes       = ["ReadWriteOnce"]
        resources {
          requests = {
            storage = "1Gi"
          }
        }
      }
    }
    volume_claim_template {
      metadata {
        name = "redis-claim"
      }
      spec {
        access_modes       = ["ReadWriteOnce"]
        resources {
          requests = {
            storage = "1Gi"
          }
        }
      }
    }
  }
}
Init container
It assigns an ordinal number to the pod’s name. In this case, the master will always be the one with 0, which will get assigned the master.conf file, and the slave will always be the ones with 1+, which would get assigned the slave.conf file.
Volumes
On the volume_mount section ,inside the init container, we have “config-map” with a /mnt/ mount path, which later, on the volumes section, puts the configmap resource in that path. This is not a PV. Also we are doing a Terraform reference here.
The other volume mount is the redis-claim with an /etc mount path, which is where the init container will put the redis-server configuration files. This is a PV.
Last but not least, we have a volume mount for the redis-data with a /data mount path, which is the Redis working directory specified in this line of the redis configuration.

Volume Claims
At the end of the configuration, we have two volume claims, one for the redis-data, and one for the redis-claim with the storage size and the access mode specified. This should dynamically create the persistent volumes if your cluster is able to do so. You can find more information about that here: https://kubernetes.io/docs/concepts/storage/dynamic-provisioning/#using-dynamic-provisioning
Testing time
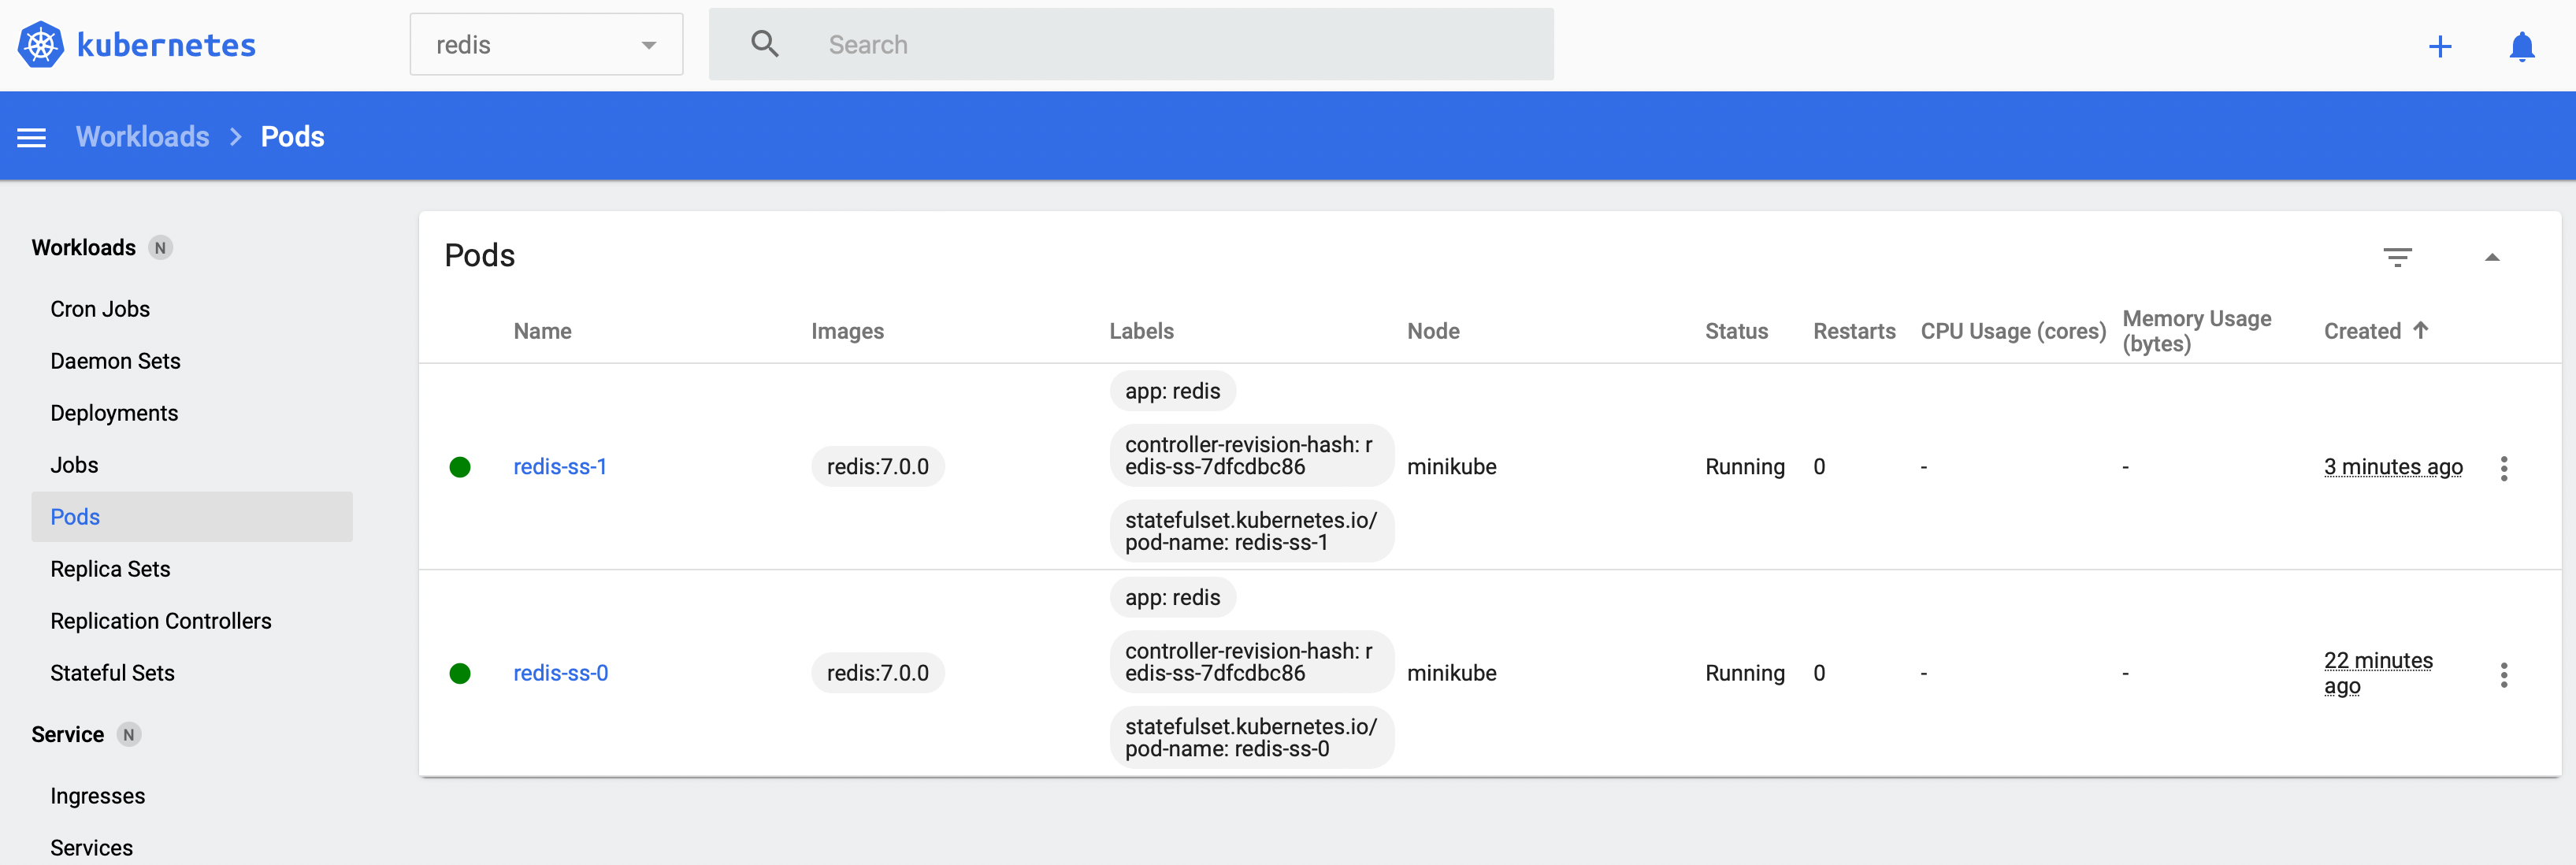
Run your Terraform plan and apply it. You should see the namespace, service, statefulset, and configmap resources created. Also the pod should be up and running:

Let’s scale it up to 2 replicas:
kubectl scale -n redis statefulset redis-ss --replicas=2
We will see the slave replica running with an ordinal number of 1.

On the replica configmap, we hardcoded the slave.conf. One of the lines was slaveof redis-ss-0.redis-service.redis 6379, which means it will automatically start replicating from the master. Let’s confirm that by checking the replica logs:
kubectl logs -n redis redis-ss-1
# oO0OoO0OoO0Oo Redis is starting oO0OoO0OoO0Oo
# Redis version=7.0.0, bits=64, commit=00000000, modified=0, pid=1, just started
# Configuration loaded
...
* Connecting to MASTER redis-ss-0.redis-service.redis:6379
* MASTER <-> REPLICA sync started
* Non blocking connect for SYNC fired the event
* Master replied to PING, replication can continue...
* Partial resynchronization not possible (no cached master)
* Full resync from master: 402ead73f2a9ee44c815be67babd48d2e9889a14:14
* MASTER <-> REPLICA sync: receiving streamed RDB from master with EOF to disk
* MASTER <-> REPLICA sync: Flushing old data
* MASTER <-> REPLICA sync: Loading DB in memory
* Loading RDB produced by version 7.0.0
* RDB age 0 seconds
* RDB memory usage when created 0.95 Mb
* Done loading RDB, keys loaded: 0, keys expired: 0.
* MASTER <-> REPLICA sync: Finished with success
It looks like is working perfectly!
Thanks for reading. If you have any questions, please feel free to drop a comment.
References
- Repository for this post
- Terraform stateful set docs
- Minikube docs
- K8s persistent volumes
- K8s StatefulSets
- Similar content without Terraform, check this great post

